How to Change the RDP Port on Windows Server 2016/2019/2022

This guide provides a step-by-step process for changing the Remote Desktop Protocol (RDP) port on Windows Server versions 2016, 2019, and 2022. Follow these instructions carefully to ensure a smooth transition to a new RDP port configuration, while also setting up necessary firewall rules. 

If a step-by-step guide isn’t your style, why not check out this video tutorial. In just a few minutes, you’ll see exactly how to change your RDP port with straightforward visuals – no fuss, just the info you need.


Step 1: Open the Registry Editor

To begin changing the RDP port, access the Registry Editor by typing `regedit` into the Windows search bar, which will open the Registry Editor.


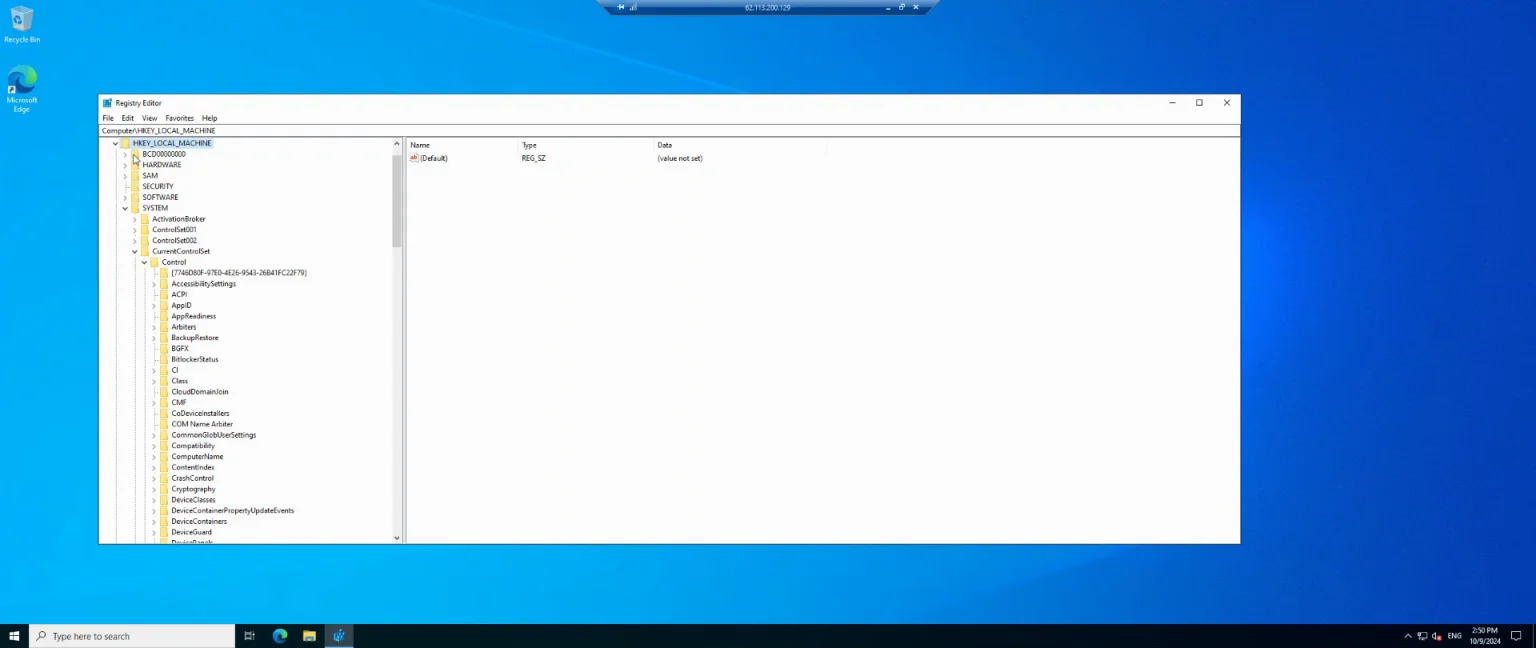
Step 2: Navigate to the RDP TCP Settings

Select the Registry Editor. Navigate to the RDP TCP port settings through the Registry Editor by accessing the `HKEY_LOCAL_MACHINE` directory.


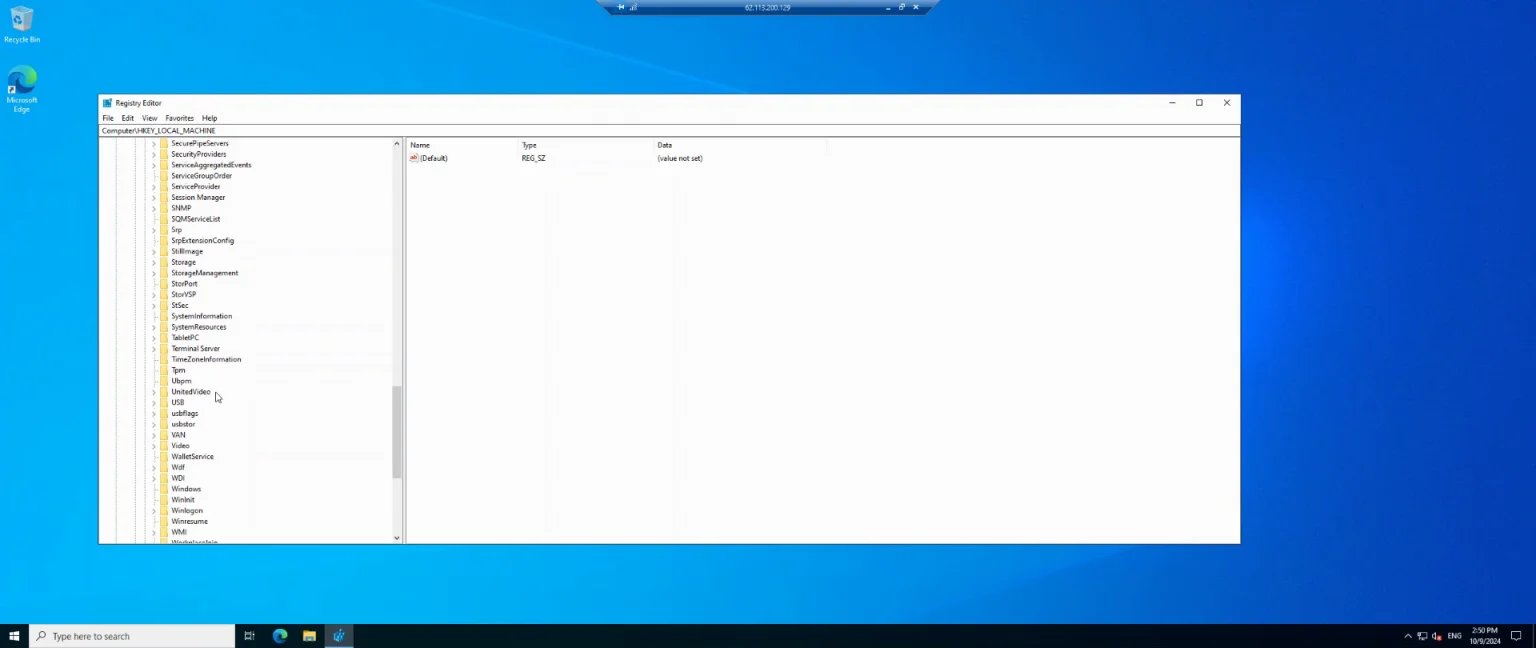
Step 3: Access the System Directory

Within `HKEY_LOCAL_MACHINE`, proceed to the `System` directory. Navigate to `CurrentControlSet`, then access the `Control` folder. Within `Control`, locate the `TerminalServer` directory.


Step 4: Locate the Terminal Server Directory

Locate and select `TerminalServer`within the `Control` directory.


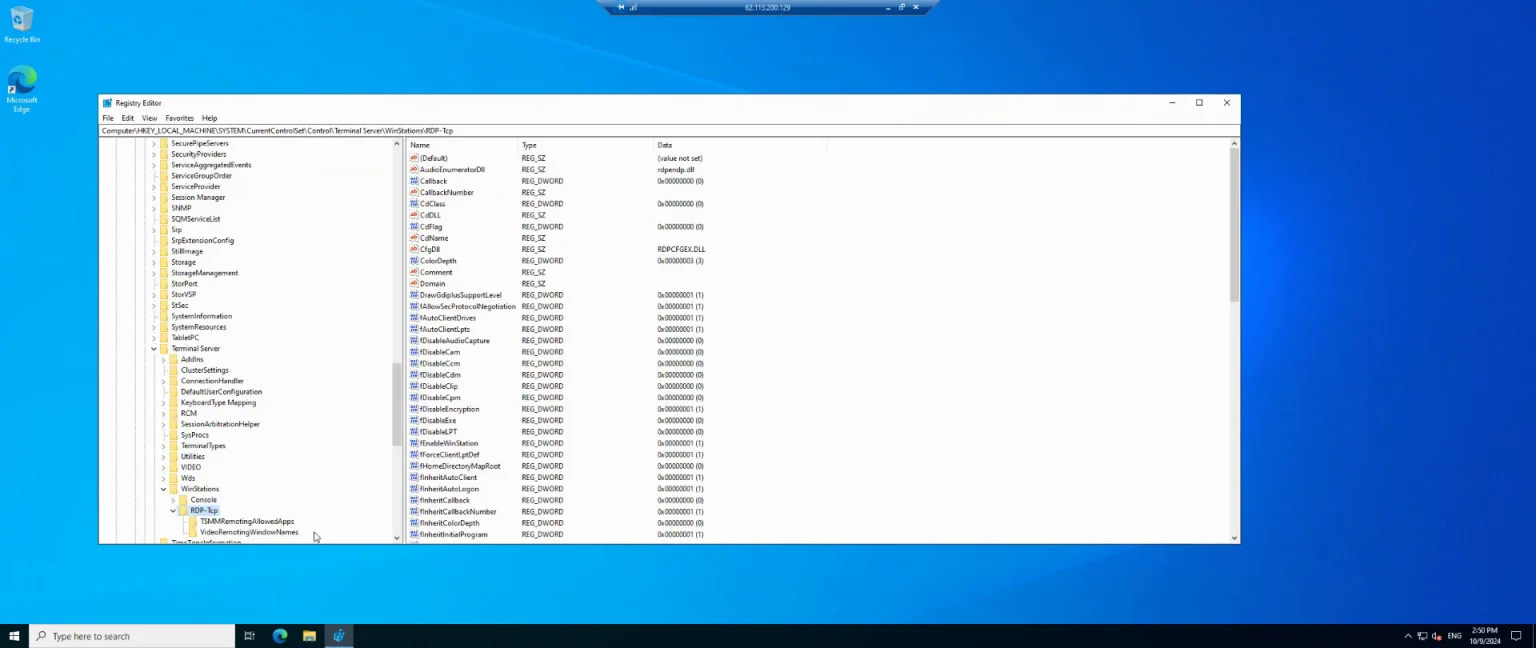
Step 5: Open the RDP TCP Settings

From `TerminalServer`, go to `WnStations`, and then select `RDP-TCP`. Identify the file labeled `PortNumber`. Right-click on `PortNumber`, select `MODIFY`.


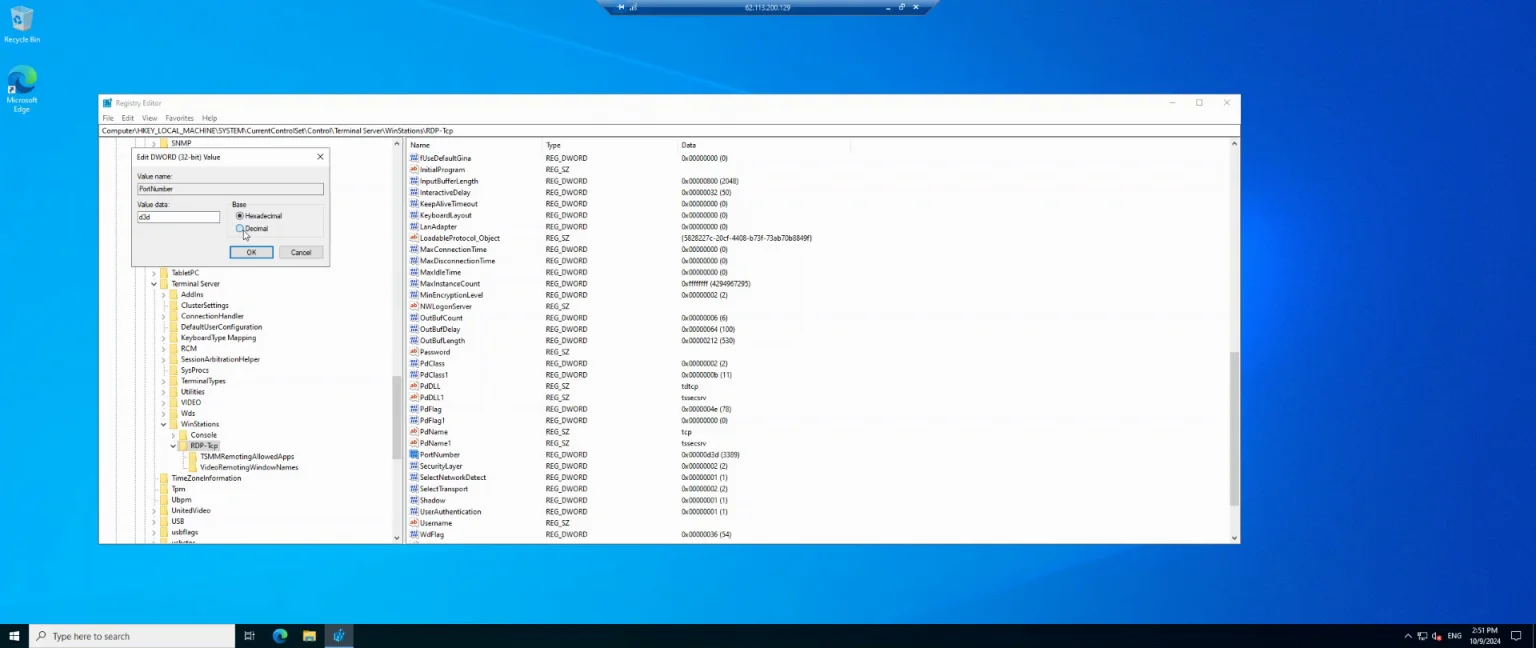
Step 6: Modify the RDP Port Number

Choose the `DECIMAL` option and input the new port number. Once entered, confirm by clicking `OK`. If `WINDOWS FIREWALL` is enabled, proceed to open `WINDOWS FIREWALL`.


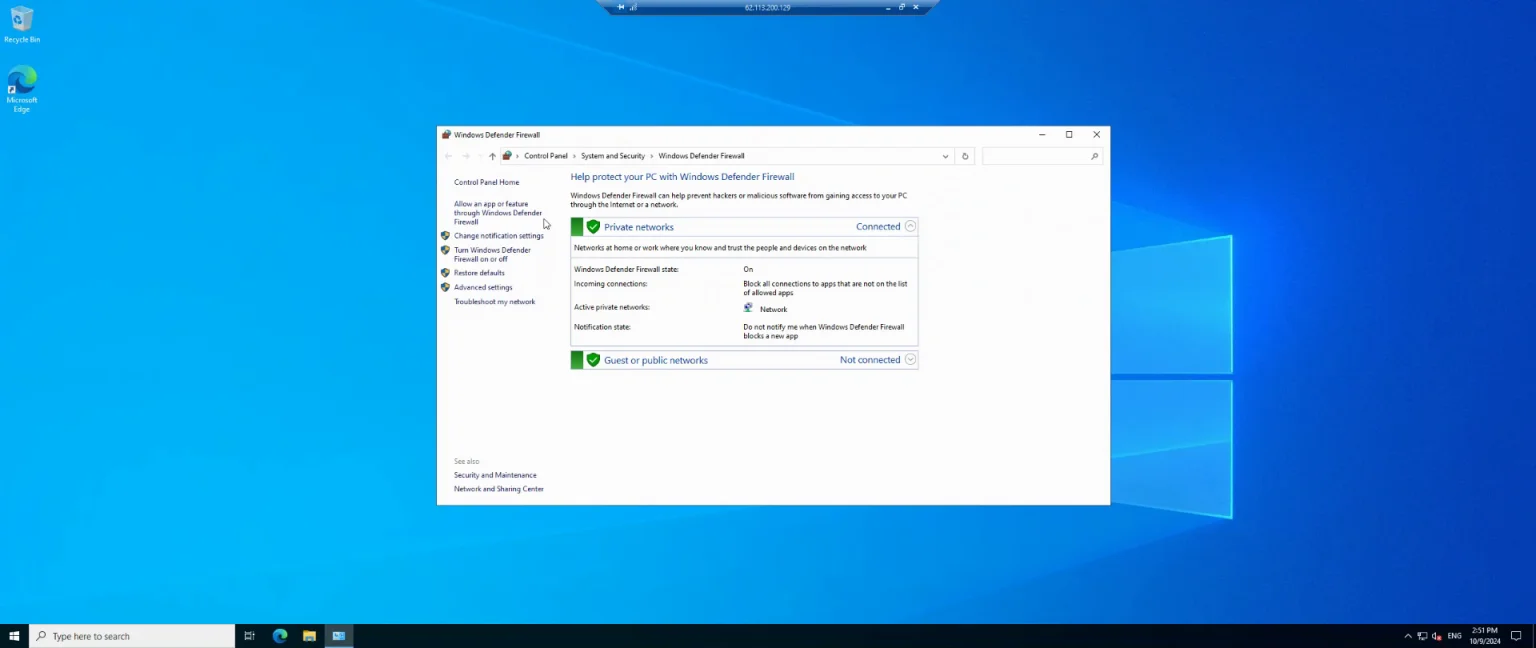
Step 7: Open Windows Firewall Advanced Settings

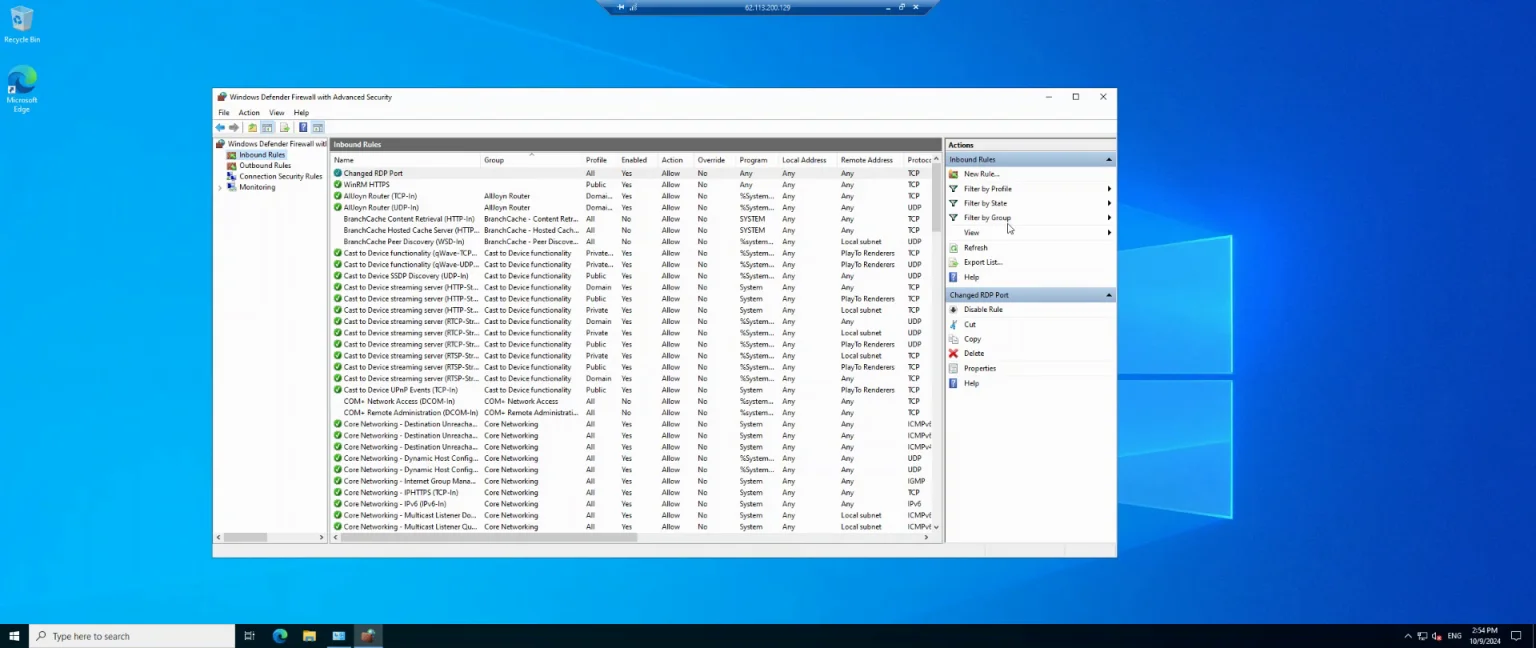
Within `WINDOWS FIREWALL`, navigate to `ADVANCED SETTINGS`, then proceed to `INBOUND RULES`. Here, create a new rule rather than searching for the PORT NUMBER.


Step 8: Create a New Inbound Rule for the New Port

To create a new rule, click `NEW RULE`, select `PORT`, and then click `NEXT`.


Step 9: Specify the New TCP Port

Opt for `TCP` and enter the new port number in `SPECIFIC LOCAL PORTS`. Click `NEXT` and choose to allow the connection.


Step 10: Allow the Connection

Select `ALLOW THE CONNECTION`, click `NEXT`. In the profile section, maintain the default settings and click `NEXT` again.


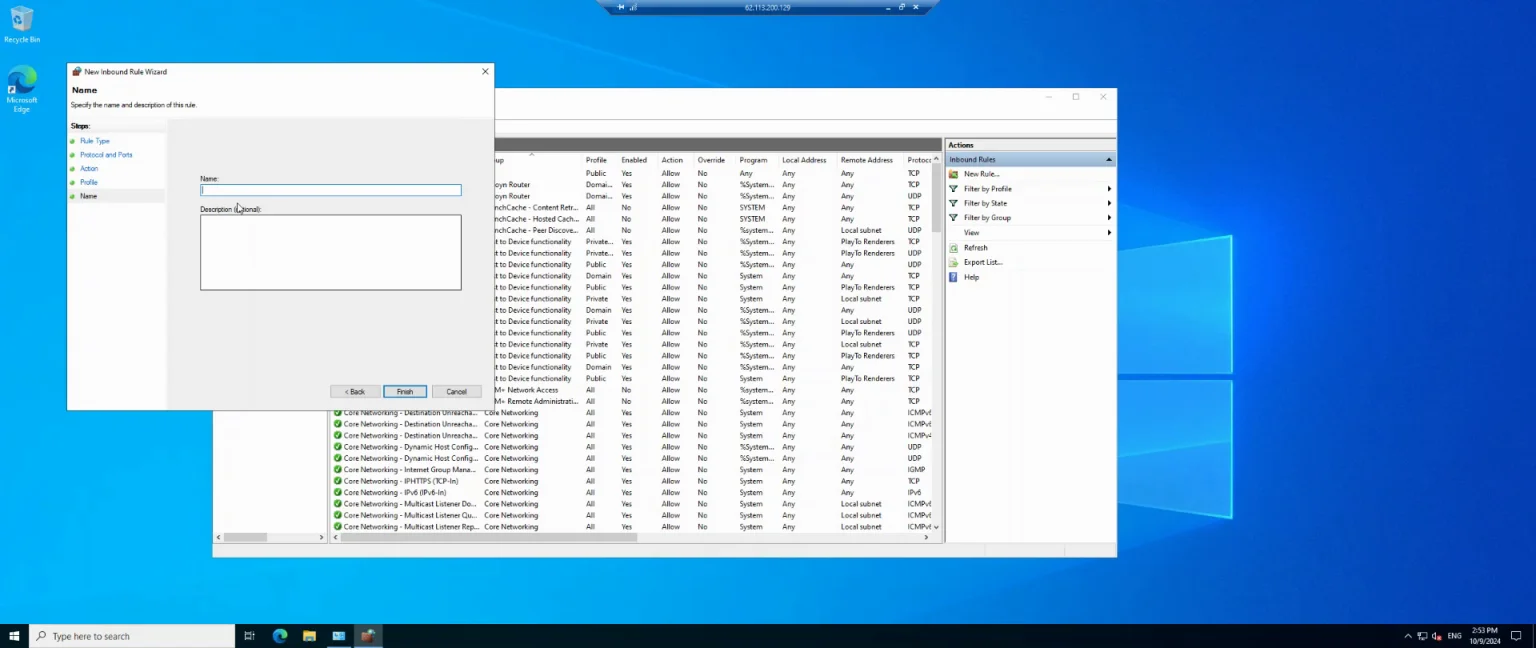
Step 11: Name and Finish the Firewall Rule

Name this rule and then click `FINISH`.


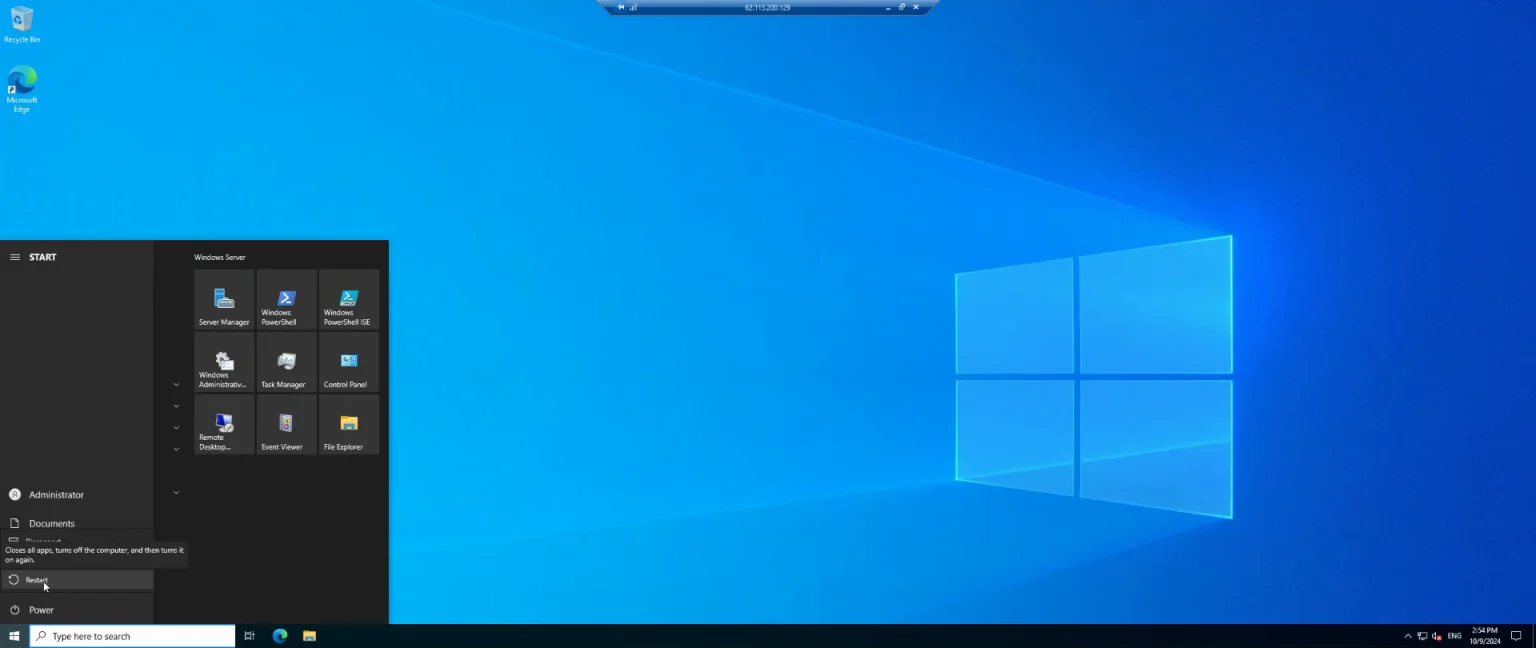
Step 12: Reboot the Server

To complete the process, reboot the server. Click `START`, then select the restart icon and choose `RESTART`.

NOTES

The steps for each file in the directory path to get to RDP TCP can be condensed into a single step as such:

HKEY\_LOCAL\_MACHINE\System\CurrentControlSet\Control\Terminal Server\WinStations\RDP-TCP


Frequently Asked Questions

What port does RDP use?

RDP (Remote Desktop Protocol) typically uses TCP port 3389 by default. This port facilitates remote desktop connections between computers over a network. For enhanced security, you can change this port or restrict access to it via firewalls or VPNs.

Why should I change the default RDP port?

Changing the default Remote Desktop Protocol (RDP) port helps improve security by reducing the chances of automated attacks and port scans. Many malicious actors specifically target port 3389, so by changing it to a non-standard port, you make your server less visible and harder for attackers to identify as running RDP services.

What port should I choose for RDP?

While there isn’t a single ‘best’ port for RDP, you should choose a port that is not commonly used by other services. Avoid well-known ports like 80, 443, or 22. For example, you could select a number between 1024 and 65535 that isn’t already in use by your system. After changing the port, ensure your firewall rules are updated to allow traffic through the new port.

How do I connect to the server after changing the RDP port?

Once the RDP port is changed, you’ll need to specify the new port number when connecting to the server. In the Remote Desktop Connection client, enter the IP address or hostname of the server followed by a colon and the new port number. For example, if the new port is 3340, you would connect using the format:

192.168.0.1:3340

Why VPS Hosting from PakiWebHost is Your Best Bet

For SMBs and startups, VPS hosting emerges as the standout choice. It combines the scalability and performance needed to tackle traffic spikes with a cost structure that won’t strain your finances. Unlike shared hosting, VPS ensures your resources aren’t compromised by other sites. Compared to dedicated hosting, it offers similar control and reliability without the high price tag. And unlike cloud hosting with hyperscalers, it avoids unpredictable bills and excessive complexity.

With VPS hosting from PakiWebHost, you get a solution tailored to handle the unexpected. You can scale resources up during a traffic surge—ensuring your site stays fast and responsive—and scale back down when the rush subsides, all while keeping costs manageable. It’s the sweet spot for businesses that need robust hosting without overcommitting their budget.

Beyond affordability and scalability, VPS hosting offers customization. You can fine-tune server settings, install specific software, and optimize performance to suit your unique needs. This level of control empowers you to prepare for spikes proactively, ensuring your website remains a reliable asset no matter the circumstances.

Strategies for Managing Traffic Spikes with VPS Hosting

To maximize the benefits of VPS hosting from PakiWebHost, implement these actionable strategies to keep your website running smoothly during traffic surges:

1. Proactive Monitoring

Stay ahead of issues by using tools like Nagios, Zabbix, or PakiWebHost’s built-in monitoring features. Track server health, traffic patterns, and resource usage in real time. Set up alerts for unusual spikes or performance dips, allowing you to respond before visitors notice a problem.

2. Load Balancing

Distribute incoming traffic across multiple VPS instances or servers with load balancers like HAProxy or Nginx. This prevents any single server from becoming overwhelmed, maintaining speed and uptime even under heavy load.

3. Caching and Content Delivery Networks (CDNs)

Reduce server strain with caching tools such as Varnish, Litespeed, or Redis. Pair these with a CDN like Cloudflare or Akamai to deliver cached content from edge locations worldwide, speeding up load times and easing the burden on your VPS during surges.

4. Optimizing Your Server Setup

Regularly audit and adjust your server configuration. Optimize database queries, allocate resources efficiently, and fine-tune application settings to enhance performance. PakiWebHost’s support team can assist in ensuring your VPS is primed for peak traffic.

By combining these strategies with PakiWebHost’s VPS hosting, you’ll transform traffic spikes from a threat into an opportunity. Your website will remain fast, reliable, and ready to impress visitors—no matter how many show up.


Conclusion: Secure Your Success with PakiWebHost

Traffic spikes don’t have to spell disaster. With the right hosting solution, they can become a chance to shine. VPS hosting from PakiWebHost offers the perfect blend of scalability, performance, and affordability, making it the ideal choice for SMBs and startups preparing for the unpredictable. By leveraging proactive monitoring, load balancing, caching, and server optimization, you can ensure your website thrives under pressure.

Don’t let an unexpected rush catch you off guard. Equip your business with a hosting solution that grows with you, keeping your site online and your customers happy. Your digital storefront deserves the best—because your success depends on it.

Ready to safeguard your website against traffic spikes? Explore PakiWebHost’s scalable, affordable VPS hosting plans today and take control of your online future. Don’t leave your performance to chance—choose PakiWebHost and stay ahead of the curve!

Avoid Hidden Cloud Host Costs

How to Avoid Surprises and Choose the Right Solution Cloud hosting is often marketed as an affordable, flexible solution with its pay-as-you-go model and scalable resources....Read More

VPS for Crypto Operations?

A Comprehensive Guide to Using a VPS for Crypto Operations A Virtual Private Server (VPS) is a dynamic solution for individuals and businesses engaged in cryptocurrency...Read More

Shared Hosting vs VPS

Shared Hosting vs. VPS Hosting: Which Is Right for Your Website? Choosing the right hosting solution is critical for your website’s performance, security, and scalability. Two...Read More

Understanding Cloud Hosting

A Comprehensive Guide for Modern Businesses In today’s rapidly evolving digital economy, businesses demand robust, scalable, & cost-efficient solutions to maintain a competitive edge. Cloud hosting...Read More

VPS vs VDS vs Dedicated Servers

Hosting Solutions: VPS, VDS, and Dedicated Servers Explained Choosing the right hosting solution is critical for businesses and individuals looking to establish a reliable online presence....Read More

Running Screaming Frog in the Cloud

Running Screaming Frog in the Cloud using a PakiWebHost Server Running SEO audits at scale can be resource-intensive, especially when dealing with large websites. Local machines...Read More

Need help choosing a plan?

Need help? We're always here for you.